Table of Contents
Chemistry Equipment
Condenser
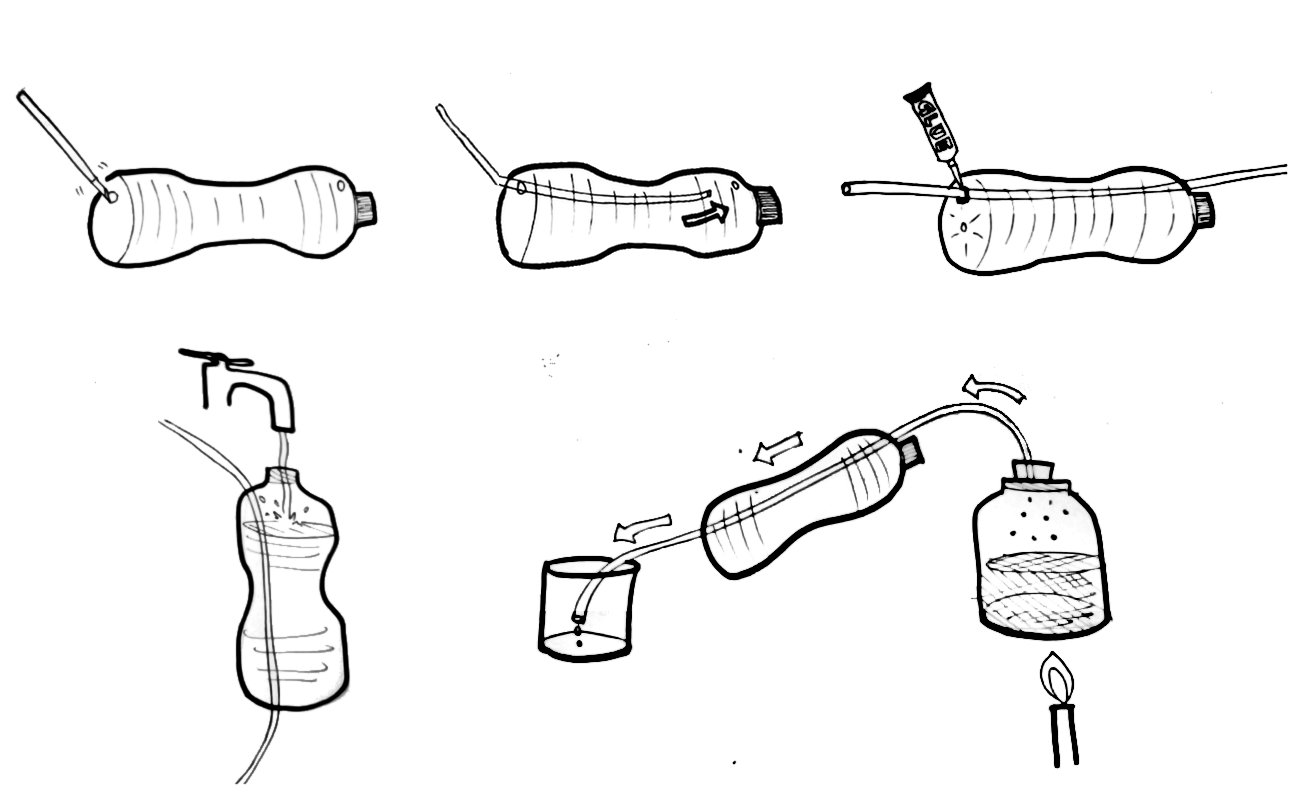
Pass clear plastic tubing through a water bottle filled with cold water and pre- vent leaks with super glue.

If your condenser is under-performing (i.e. steam comes out), coil the plastic tubing so a greater length is in the water. If you condenser is still under-performing or you plan to use it for longer period of time, devise a way to keep changing water inside the water bottle to keep it from getting too hot. Or, submerge this condenser in a trough of water. You could even run the plastic tubing through the sides of a bucket.
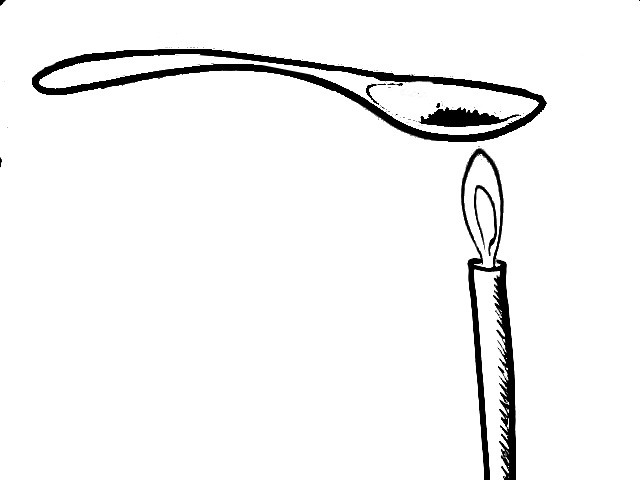
Deflagrating spoon
For heating chemicals to observe melting, decomposition, or other changes on heating, metal spoons work well. They can usually be cleaned by scrubbing with steel wool, although for the national exam you might buy new spoons. Bigger spoons may be less expensive than the smallest ones.

Delivery Tube
You can buy clear plastic tubing at many hardware shops. Even better are intravenous ‘giving sets’ available at pharmacies. If you are trying to prepare a gas that would corrode this tubing, think about what it would do to your students’ lungs and consider a different experiment.
Test Tubes
Test tubes - plastic
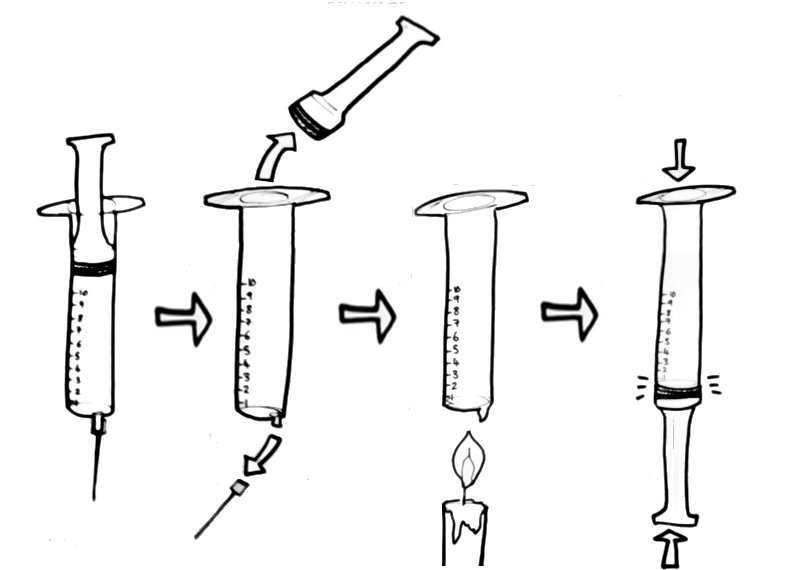
These will work for everything in biology, everything in physics, and everything in chemistry except thermal decomposition of salts. They have the obvious advantage of not breaking. To make these, remove the needle and plunger from 10 mL syringes. Heat the end of the shell where the needle joined in a flame until it melts. Press the molten end against a flat surface (like the end of the plunger) to fuse it closed. If the tube leaks, fuse it again.

Test tubes made this way may be heated in a water bath up to boiling, hot enough for most experiments.
Test tubes - glass
You can purchase glass vacuum sample tubes in bulk from medical and vet- erinary supply shops. These may generally be heated in open flame, although they are not labelled as borosilicate (Pyrex), and will probably break sooner. We have not tested them in Bunsen burners.
For Thermal Decomposition
See Deflagration Spoon
Test tube holder/tongs
For prolonged heating, you can wrap stiff wire tightly around the lip of the test tube. For shorter heating, you can do the same with a strip of paper or clot. You can also find a carpenter to make large wooden holders. Clothespins work well if you can find them large enough, or if you use smaller tubes, or it you use tubes made from syringes with useful flanges at the top.
Test Tube Stoppers
These can be made by the people who cut up old tires or you can make them yourself from old sandals. However, stoppers are rarely required. If you are using the stopper because you want to shake a flask, consider just using a water bottle with a screw cap. If you want a stopper with a hole for passing out a gas you are producing, again use a water bottle and super glue the tip of a clear plastic pen body into the cap. You can then mount rubber tubing onto the pen tip for a reliable connection.
Water bath
Take an aluminum pot and fill with water. Put this on top of any heat source and let the water heat up. Place the test tubes in the hot water to heat. If heating the liquids in the test tubes to a specific temperature, make sure students put the thermometer in the test tube, not the water. For smaller scale work, use the bottom half of an aluminum can. Many times, the water bath will be much larger than the test tubes and they might fall over, into the water. Devise methods to prevent this. You might clamp the tubes to the side with clothespins, attach parallel wires to the container to rest the tubes in between, or punch holes in a flat piece of plastic to put over the top of the water.
Mortar & Pestel
To powder chemicals, place them between two nested metal spoons and grind down. Alternatively, you can crush chemicals on a sheet of paper on a table by pressing on them with the bottom of a glass bottle.
Electrolytic Cell
Remove the plungers from two 10 mL syringes and bore out the needle port with something sharp (knife, thin pliers, etc.). Remove material gradually, rotating the piece to ensure a circular cut. When the hole is just big enough, force through a graphite battery electrode so 0.5-1 cm remains on the outside. Twist the electrode during insertion to prevent it from snapping. The gap should be air-tight, but if the cut was too big or irregular you can seal the holes with super glue. Attach wires to the exposed part of the electrodes. To use the cell, fill the tubes with your electrolyte solution and place them wire end up in the cut off bottom of a large water bottle, also filled with elec- trolyte solution. Attach the wires to a power supply (three or more 1.5 V dry cell batteries in series, a 6 V motorcycle battery, or a 12 V car battery) to start electrolysis. The volume of gas produced at each electrode may be measured by the gradations on the syringes, and other products (copper metal plating, iodine in solution) may be clearly observed.