Table of Contents
<a href="?do=export_pdf">Printable PDF</a>
03CuttingSolarCells
Overview
The club learns about solar cell structure, and learns the tricky skill of cutting solar panels! They get some practice at cutting then cut the pieces they need for the panels they designed in the last lesson in the solar curriculum.
It is a good idea for instructors to get comfortable cutting cells before the lesson, to be able to adequately help students.
Materials
Each setup (per student or group of students) requires:
- Solar Cells - enough for the students' projects, ideally twice as much as necessary to allow for breaking as learning technique
- Craft foam, felt, or something similar
- Corrugated cardboard or thin ply piece, slightly larger than solar cell
- Straight Edge - metal ruler is best
- Cutting tool - Tungsten Carbide scraper blade has been successful, glass cutting tools, carbide scribe, diamond scribe, diamond-tipped dremmel (if you have a jig to hold it steady). Normal razor blades DON'T work well.
- The more cutting set-ups the better, but some of the cutting tools can be expensive.
Background Concepts
Some notes on solar cell structures and what this means for cutting cells
Solar cells are made out of silicon, like glass. Therefore they are like glass, and quite hard - meaning anything you use to cut or score them must be harder than it is! Most cheap razor blades are not hard enough. Some options are a diamond-tipped dremmel (if you have a jig to hold it steady), diamond or carbide scribe, tungsten-carbide scraper blade, or glass cutting tools. If you only have razor blades, they can be used, but it will take longer and the blades need to be replaced very often, as they will dull quickly.
Unlike glass, solar cells are crystalline, rather than amorphous. This means that they are more brittle and also have an orientation, whereas glass is non-directional. They'll tend to break “along the grain” (if you imagine the boundaries between crystals to be like the grain in a piece of wood) so if you attempt to make cuts in this direction, they'll be less likely to break in a direction you're not intending.
Each solar cell is a wafer of silicon, with a network of white traces on top to collect the electrons. The contacts are spread out so as to collect electrons from all over the cell. Therefore, when you cut the cell into pieces you should be sure all the traces are connected, so all the electrons can be delivered through the circuit.
The entire back of the cell is connected, but there are six (usually) small white rectangles that are easier to solder to than the surrounding silvery area, so although it's not necessary, it's a good idea to have at least one on each piece that you cut, in order to make soldering them together easier.
How to cut solar cells:
Solar cells are thin and brittle, if they bend, they can shatter. Try to distribute any force you put on them, in order to keep them flat. They are also very hard, so cutting through them would be long and difficult. Instead, use the 'score-and-snap' method:
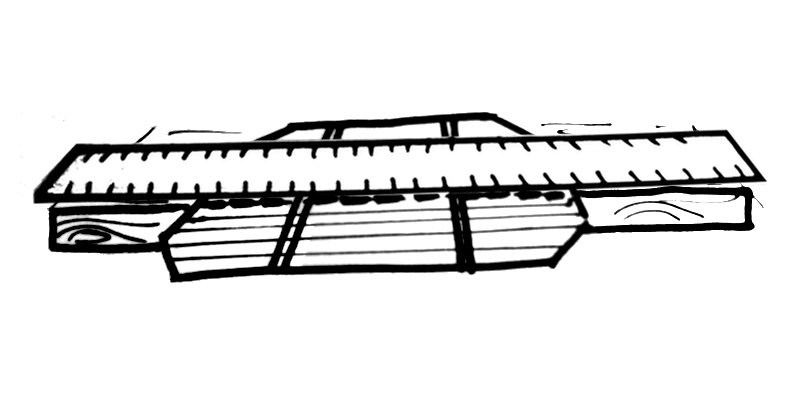
- Place craft foam or felt on flat surface, such as table
- Place cell on top of it
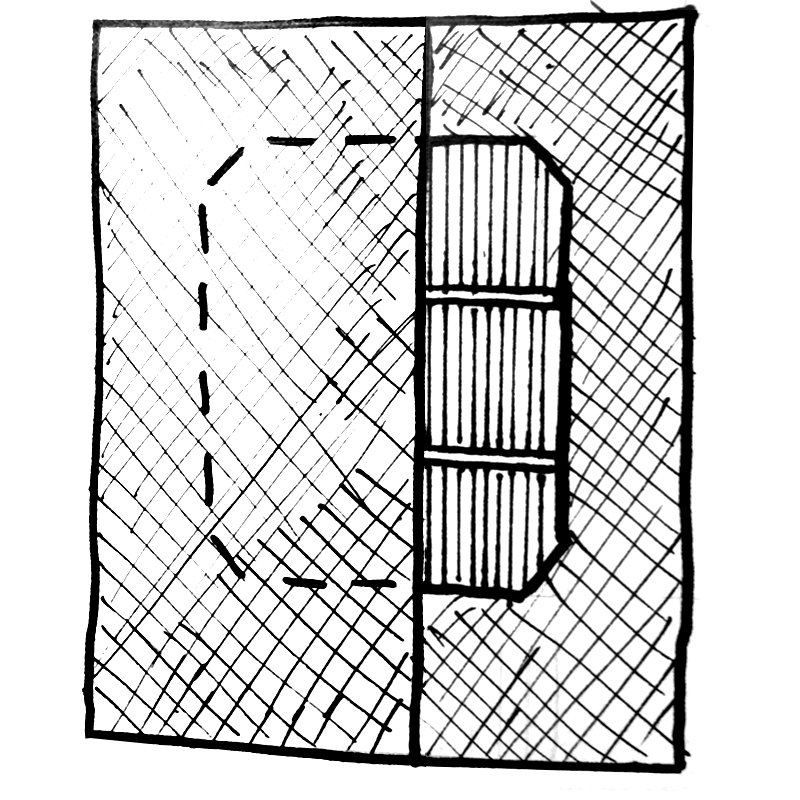
- Line up second piece of foam with where the cut should be
- Put straight edge on top of second piece of foam, so the cutting tool can be dragged along it
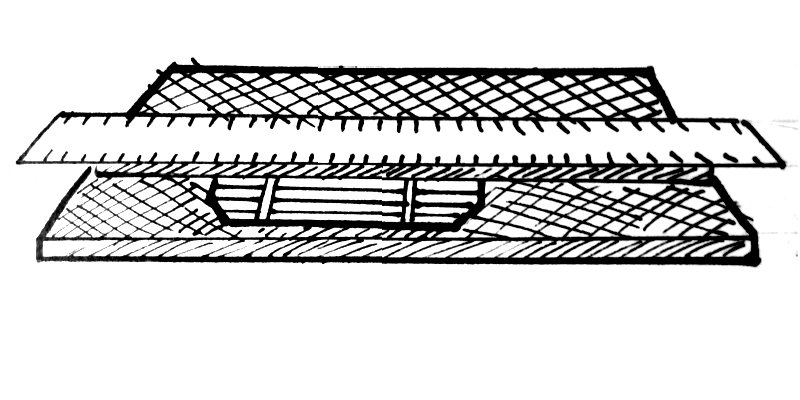
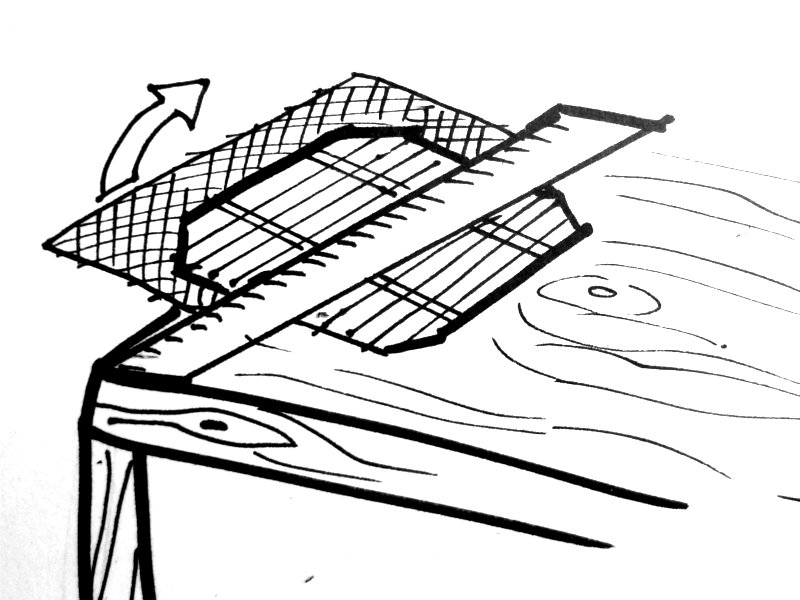
- Use tool to score cell: go back and forth several times, with light pressure. Different tools may be more or less effective – anywhere from 6 to 20 (to upwards of 100 if using cheap razor blade) times across the cell. You should be able to see a scratch at most places along the line before you stop scoring.
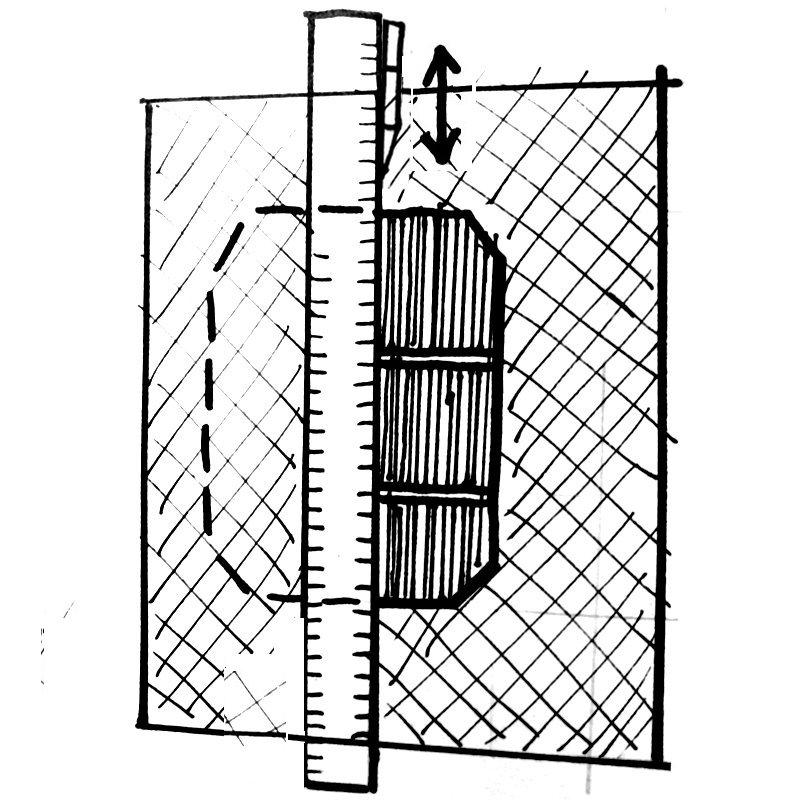
- To snap, move cell so that the part you are snapping off is at the edge of the table. Line the score up so that it is just barely off the table.
- Put the straight edge on top of the cell, at the very edge of the table and hold it down firmly
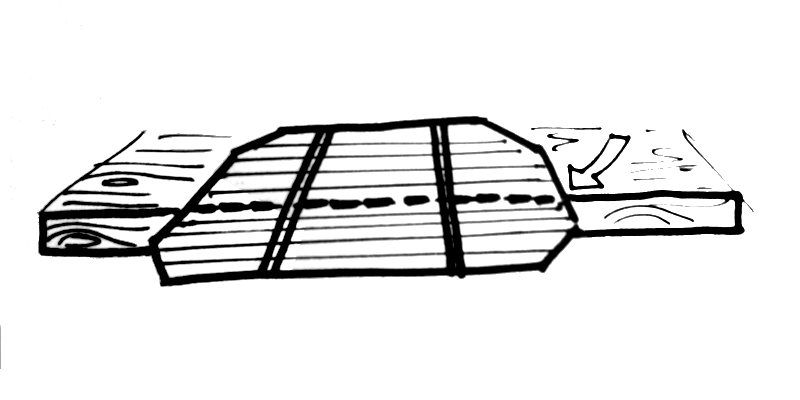
- Put the cardboard under the cell, and, keeping the edge that's against the table firmly against the table, tilt it up until the cell snaps, hopefully along the score.
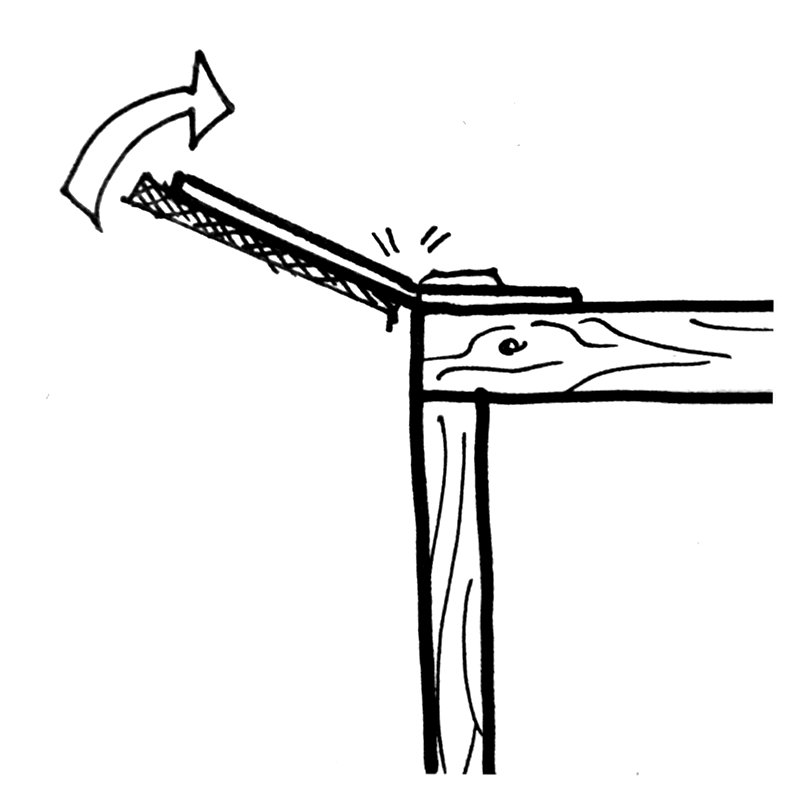
- Try this several times. You should be able to get a feel for when the cell will break properly and when you might need to go back and score some more. It still is unlikely to be 100% success rate, though.
Lesson Plan
1. HAND OUT SOLAR CELLS
Either give out one per every two students, or one to every student. The former option might encourage students to discuss things together.
Remind students of their panel designs from Lesson 2 - many of them will have design that require solar cells to be cut to get the right voltage.
Discuss cell properties in the context of choosing where to make cuts and what kind of tool to use, talking about choosing where to cut the cells in relation to the cells being crystalline and the traces on the front and back contacts, and what tool to use in relation to the hardness of the cell. You might have students try to scratch the cells with their fingernails, a paper clip or resistor lead, and/or cheap razor blades to see that none of them have much effect.
2. DEMONSTRATE HOW TO CUT CELLS
Have students try a few times, with as many set ups as you can. It is probably ideal to have at least one instructor for every two set-ups at this point, as it can be tricky and students might need hands-on guidance. (10-20 minutes, depending on student, teacher, and set-up numbers)
Use the rest of the time to get as many of the pieces cut for the students' panels (designed in lesson 2) as possible. During this time, the instructors should continue to walking around and helping students out. (40-90 minutes, depending on panel designs and numbers of students, teachers, and set-ups)