Table of Contents
<a href="?do=export_pdf">Printable PDF</a>
05OpticsAndLampBuilding
Overview
This lesson goes over the other aspects of designing and building a solar lamp - the optics (how to direct or diffuse the light to fit an application) and the physical structure of the lamp. Students then build the structure of their lamps using scrap or found materials. You may want to spread this lesson over two sessions, so that students have time to look for materials to build their lamp.
If taught within the solar curriculum, the students are also introduced to the concept of battery discharging. They will set up an experiment with the solar panels to show how they discharge overnight, and can check the results in the next lesson.
Materials
Per student/group of students:
- Solar panel of any size (can be one made in Lesson 4, but does not have to be)
- Battery in holder of some sort
- Alligator clips
Stuff to build lamps out of:
- Cardboard, bottles, shiny things, translucent things
- tape
- glue
- tacks
- nails
- scissors/knife - Enough for each student to make lamp - it is highly recommended to have multiple pairs of scissors/knives to avoid bottlenecks
Background Concepts
Charging/Discharging
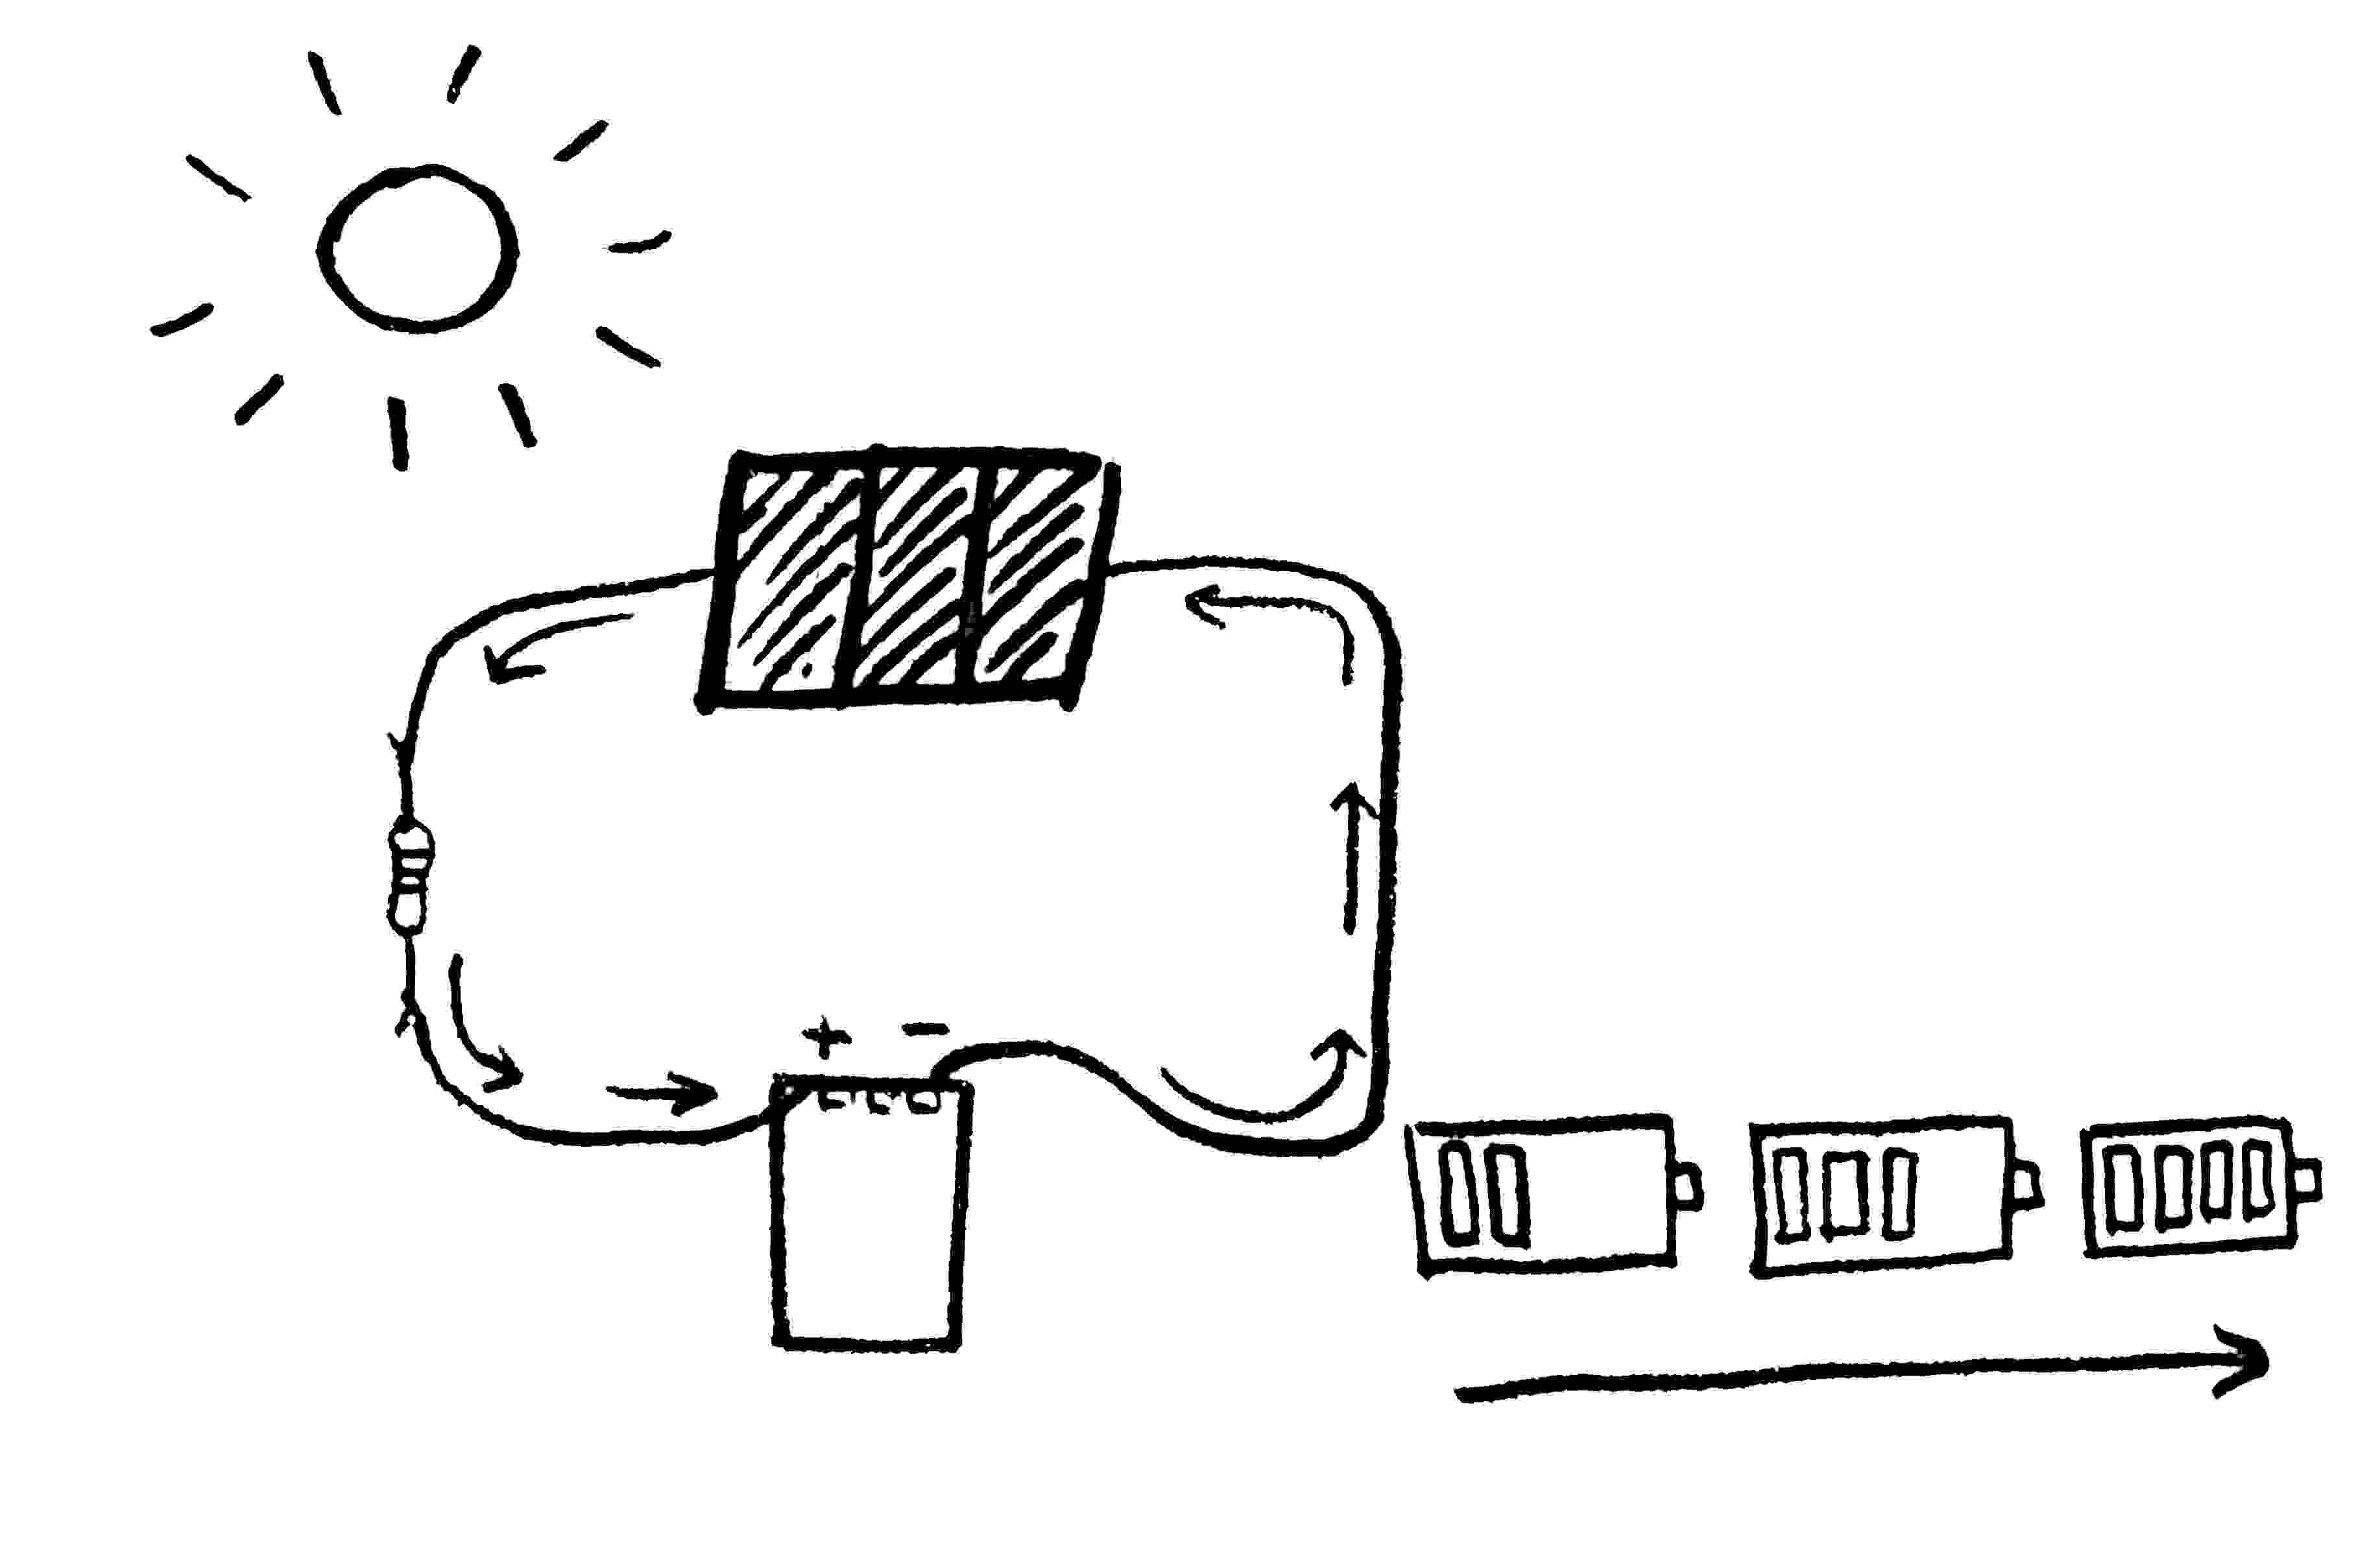
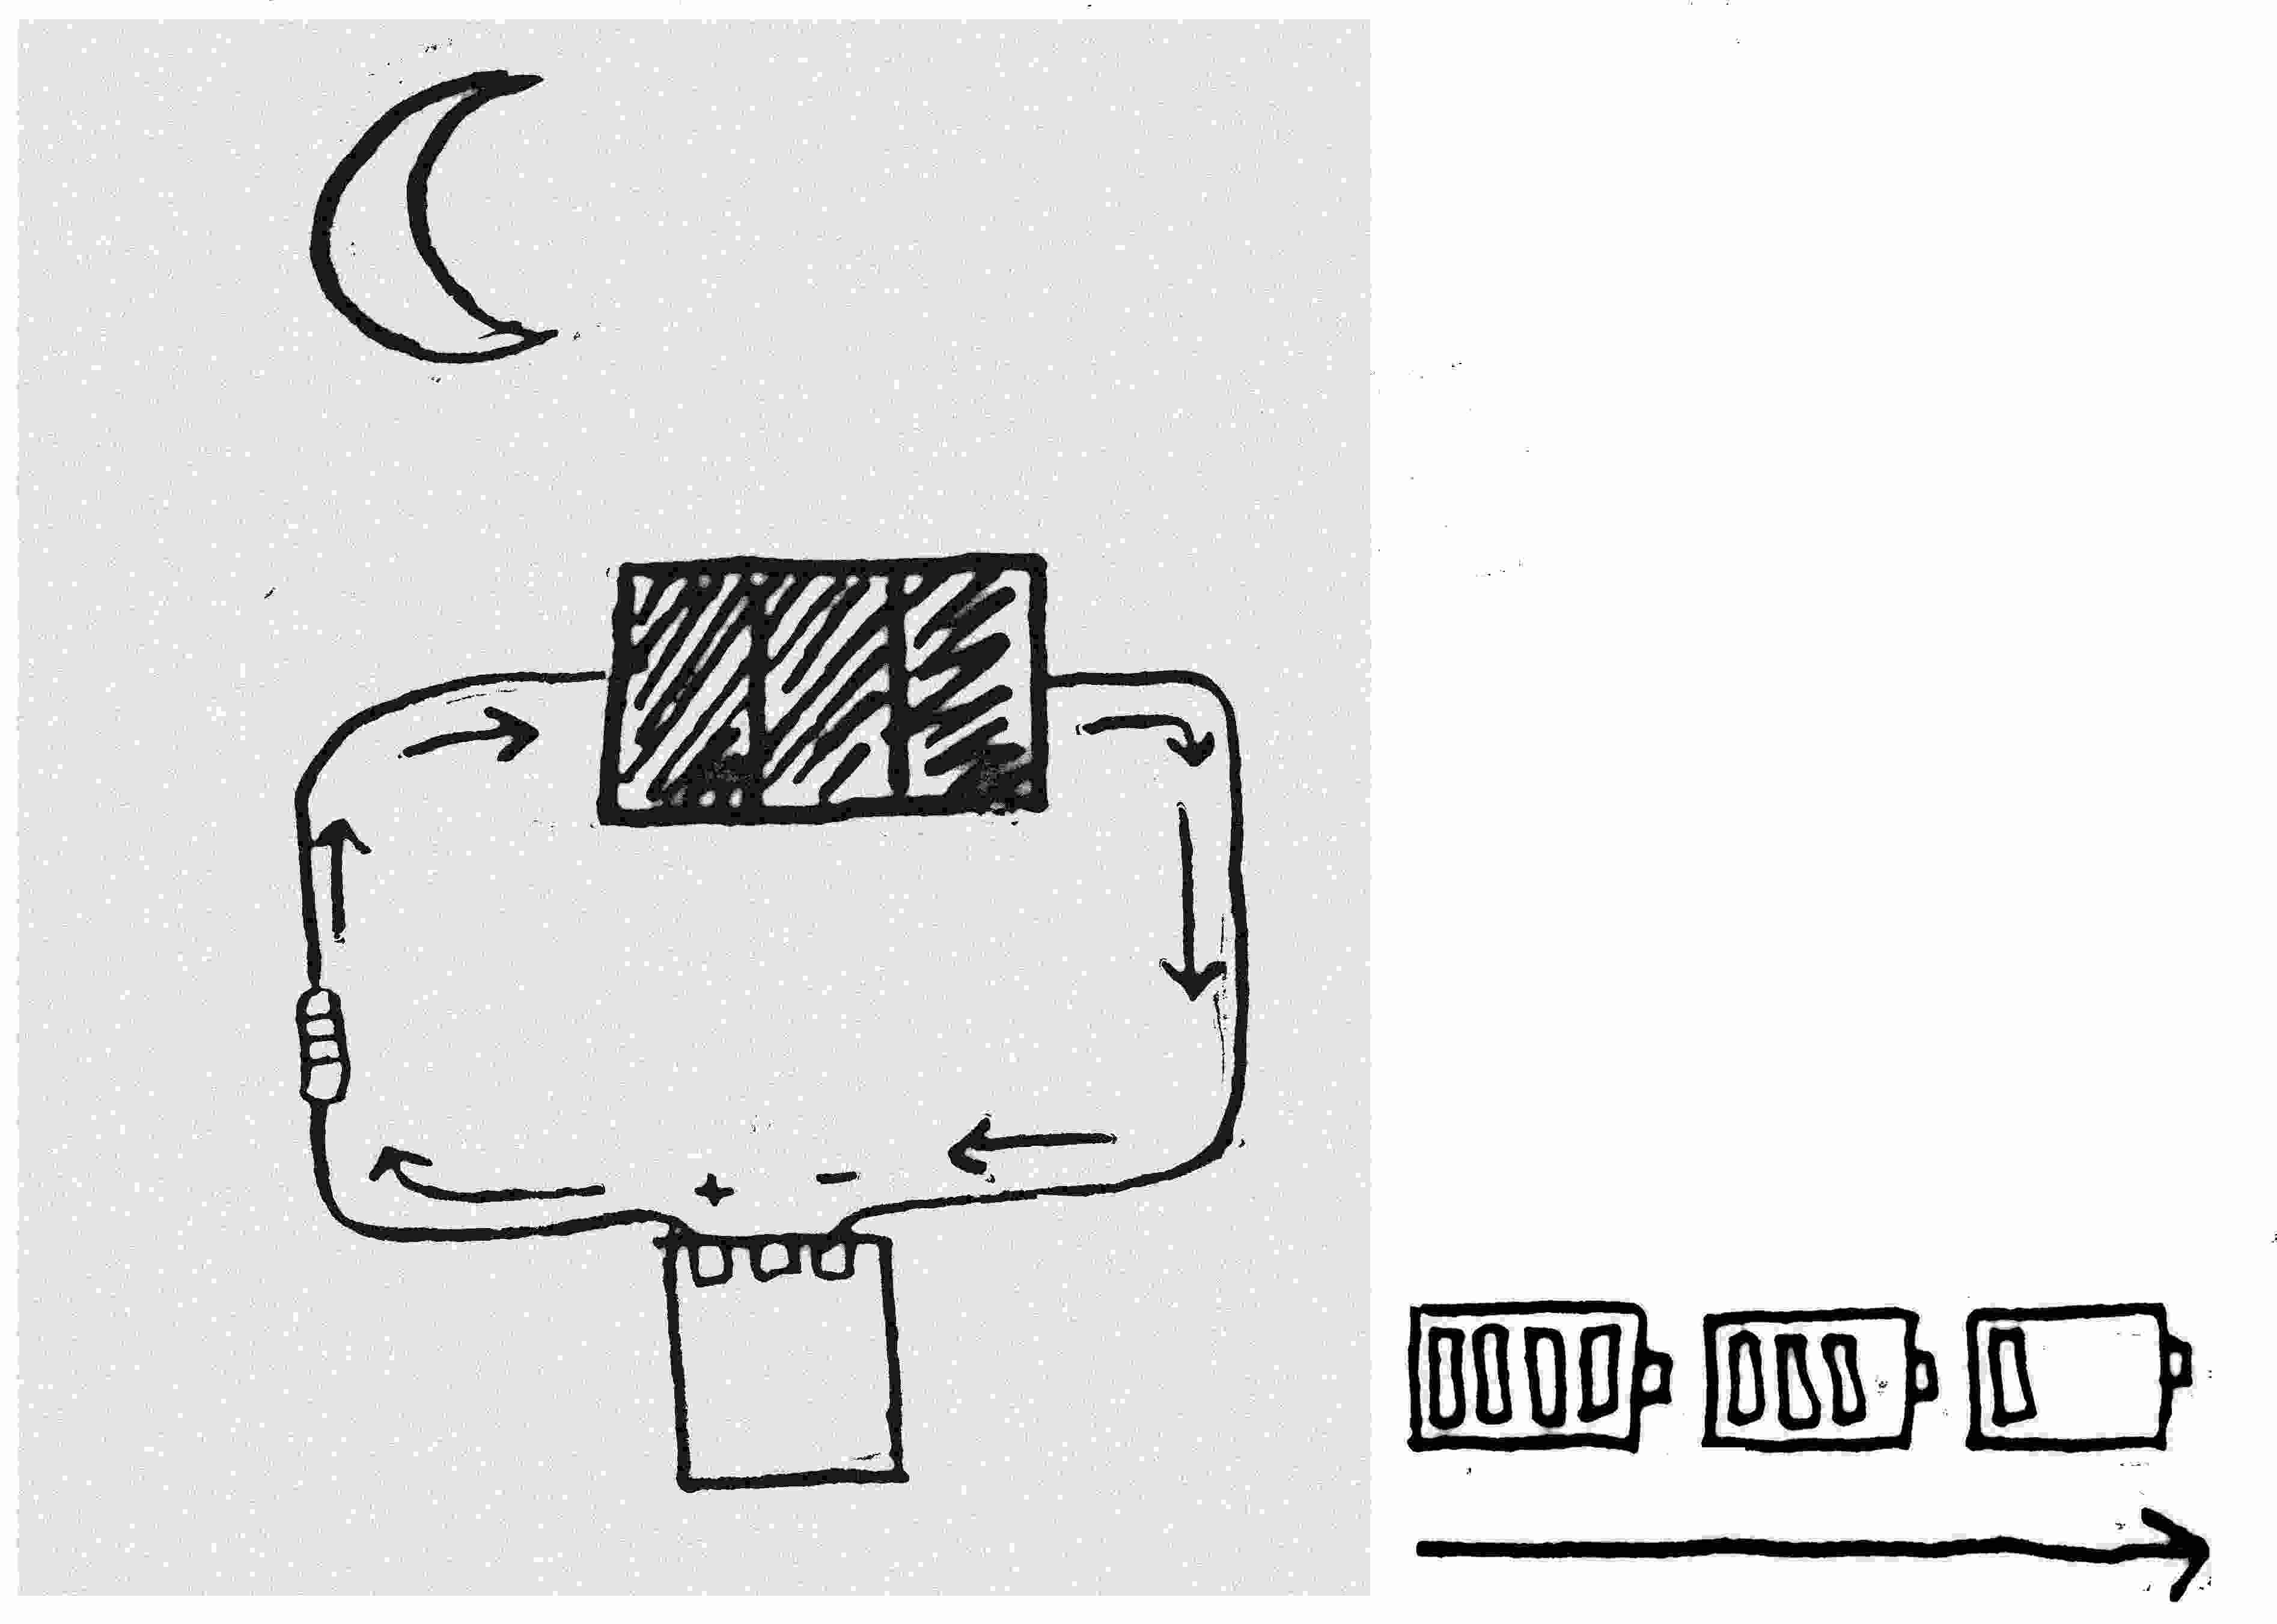
Obviously, the solar panel charges the battery while it is put in the sun. However, if the circuit is left connected while the panel is in the shade, since there is a complete circuit the current will start to flow the opposite way. This means that the battery will start to discharge - whether there is a lamp connected or not – the battery is now “powering” the circuit, rather than being charged! At the beginning of this lesson students will leave their panels connected to the batteries in the dark, so that in the next lesson they will see the discharging effect.
Basic Optics
When building a lamp, there are more things to consider than just the circuit. There are various properties of light that we can use to design the lamp.
Light is a form of energy – like heat, or electricity. When light comes into contact with matter, it interacts with it in a variety of ways, depending on the properties of the material.
1. Reflection
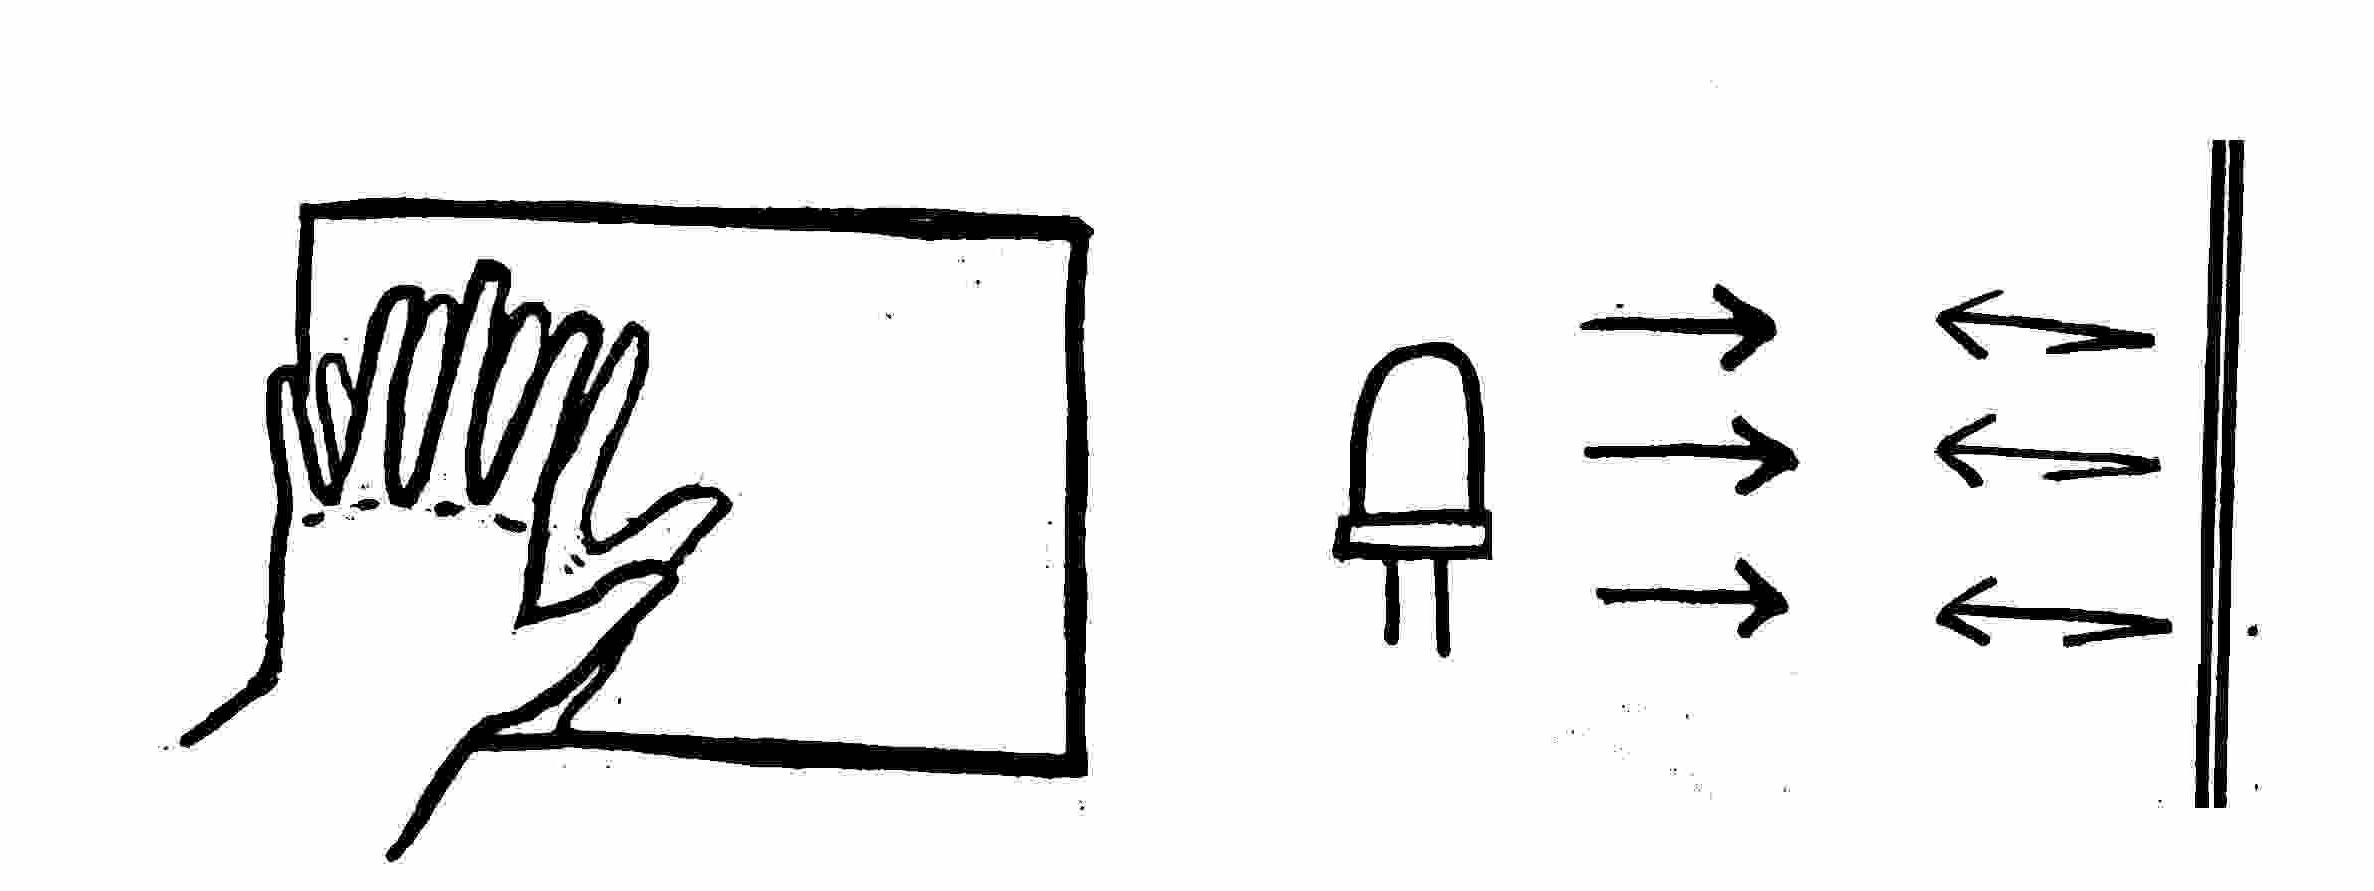
If light comes into contact with a surface that is reflective, the light hits the surface and bounces back off it in the same direction. This is like kicking a football at a wall – it bounces and comes back to you. Mirrors, metal foil and shiny wrappers are all materials that reflect light.
2. Diffusion
When light shines thin piece of paper, the light reflects off the particles inside the paper and bounces around in different directions. Unlike with reflective materials, diffusive materials don't send all the light straight back, but spread it out in lots of different directions.
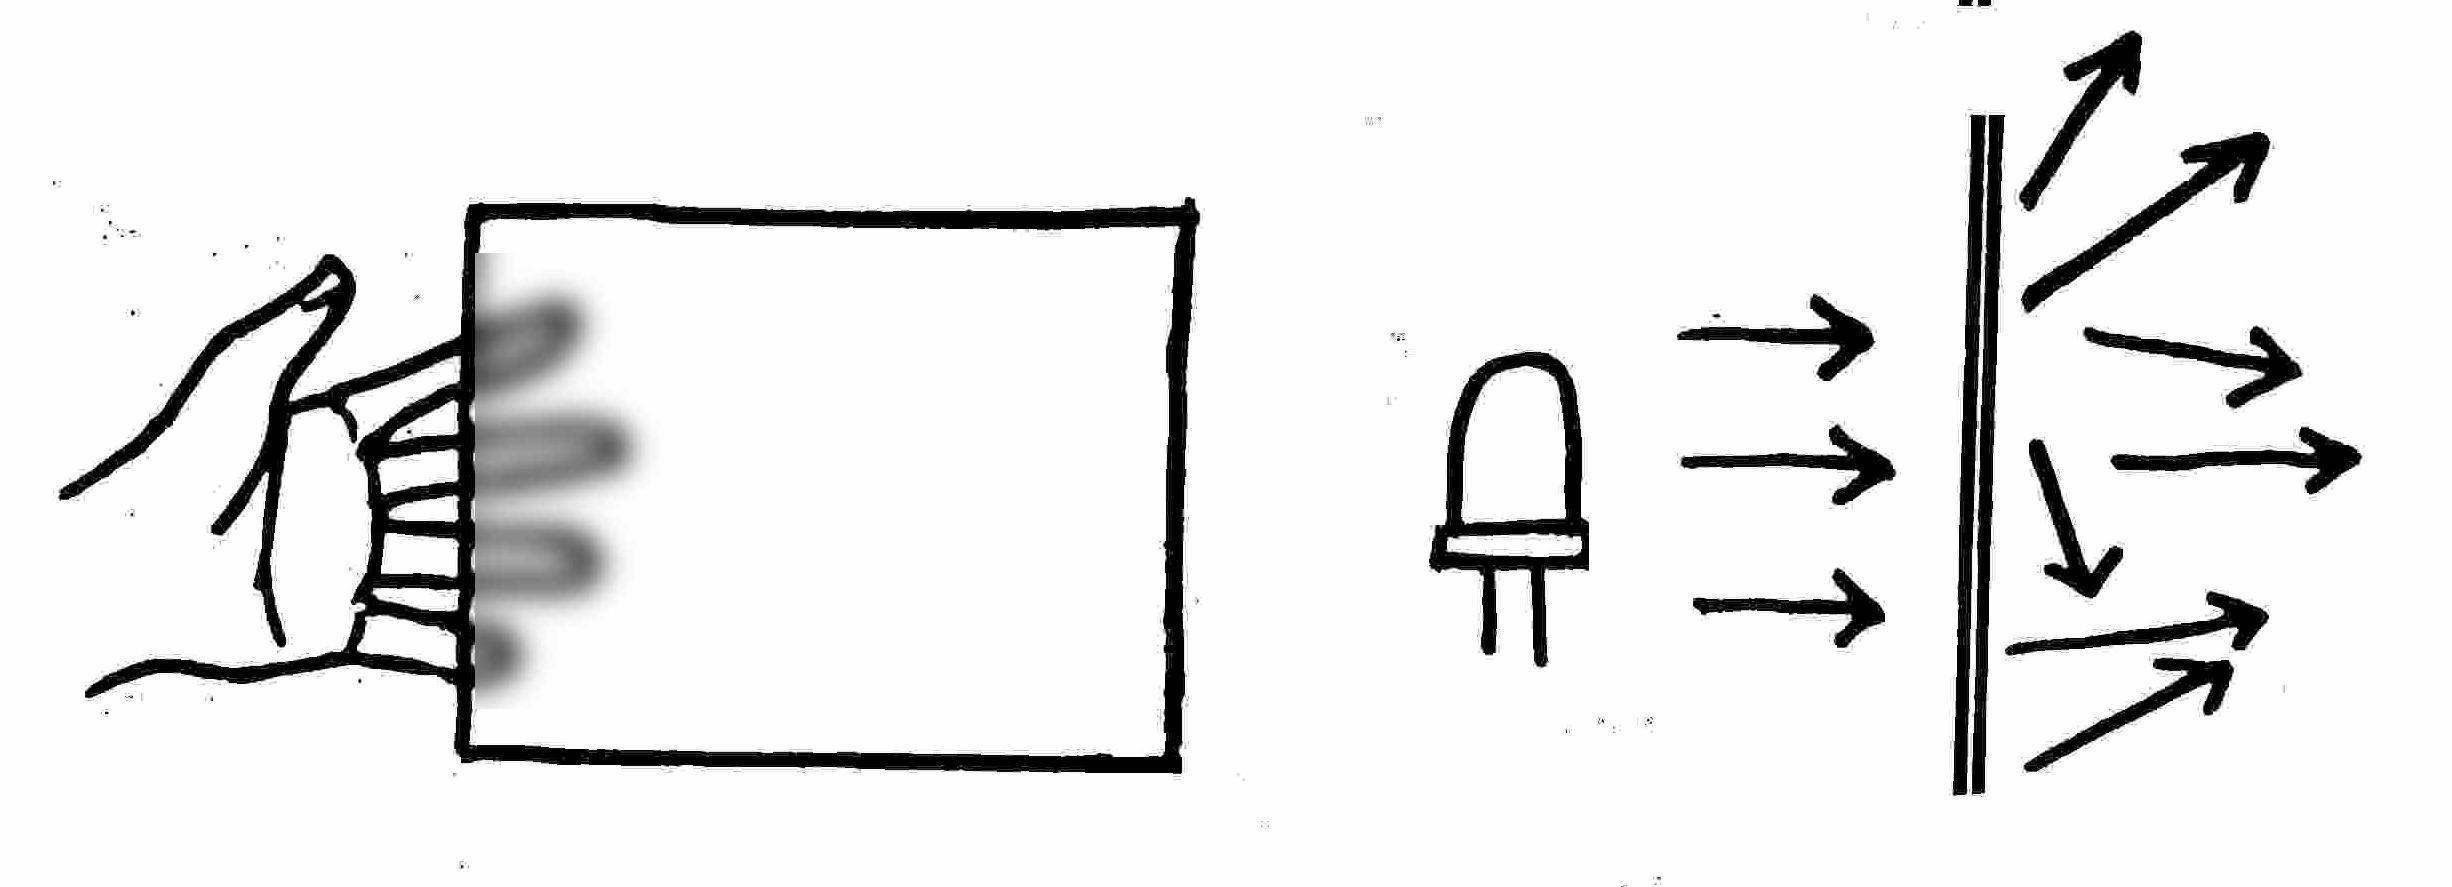
A diffuser must let enough light through, but it can’t be completely transparent— or else the light will continue in the same direction instead of getting scattered around. In a lamp with three LEDs, a diffuser could make them look like one light instead of three separate lights.
Common diffusers are thin paper or translucent plastic.
3. Transparency
Transparent materials let light pass straight through without significantly affecting it. These can be used in a lamp to protect the LEDs from damage without changing the light they emit.

For this lesson: Before you start the lamp-designing session, explain these properties to the group while letting them test out different reflective, diffusive and transparent materials with their lamps.
Building the Lamp: Design Session!
Most of this lesson will be spent on a session to design and build the structure and covering of the lamp. As with all design-based sessions, it is important to remember to encourage the students to think creatively (see the 'Teaching Tips' page for some more detailed ideas).
Wherever possible, ask students to think of designs relevant to their own lives (ask “how would you use a lamp”) Suggest, don't tell – don't show any pre-made lamps, or students will most likely copy them, thinking they are the “right” answer. Encourage all suggestions, even crazy ones!
Some lamp-building principles to remember
1. Using optical properties
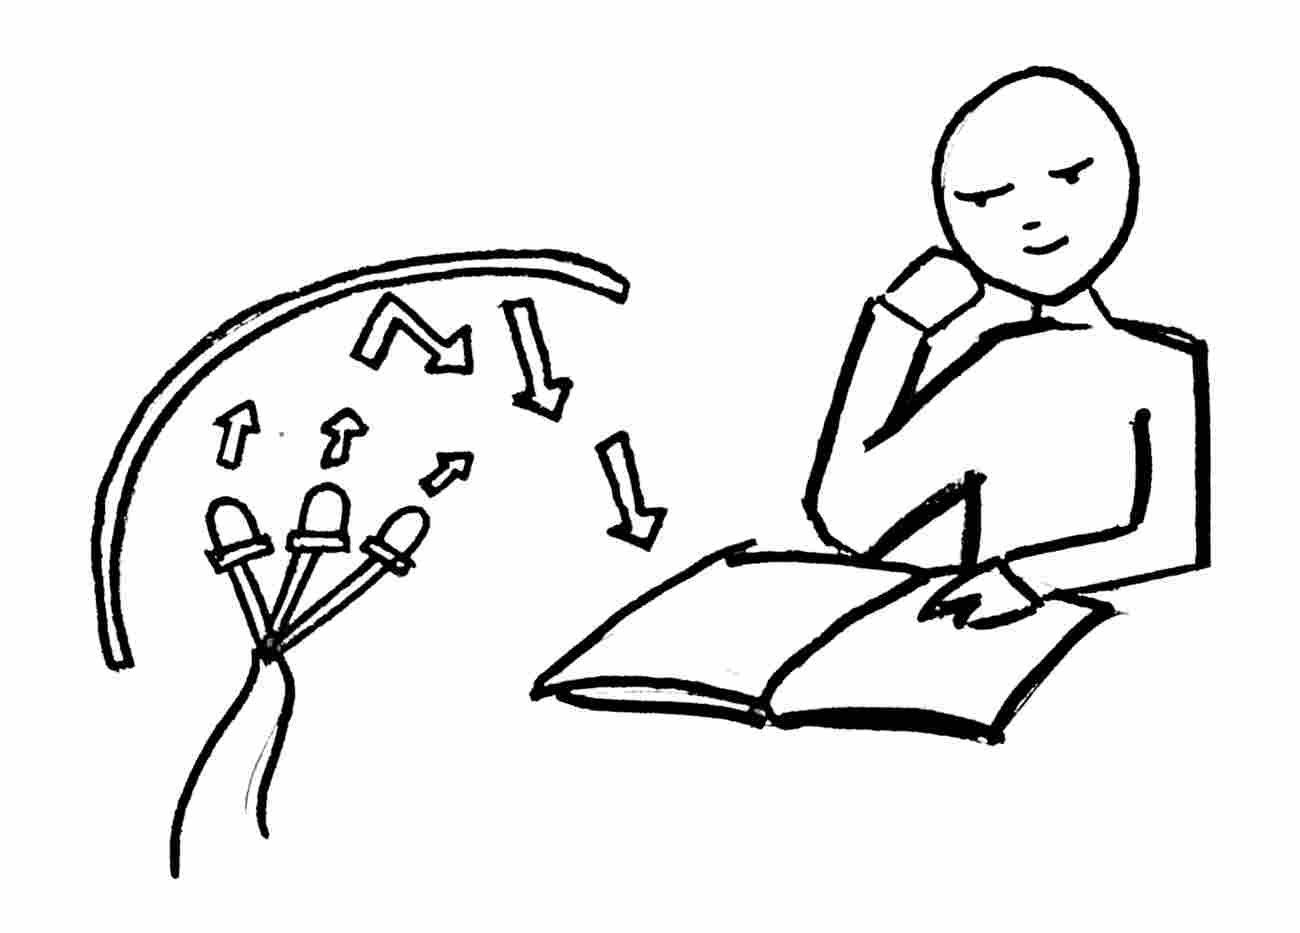
Diffusion, reflection and transparency in materials can be used to build a more effective lamp. For example: Reflective materials can be used to point light in a particular direction, if the lamp is being used for something focused – e.g. a desk lamp for reading.
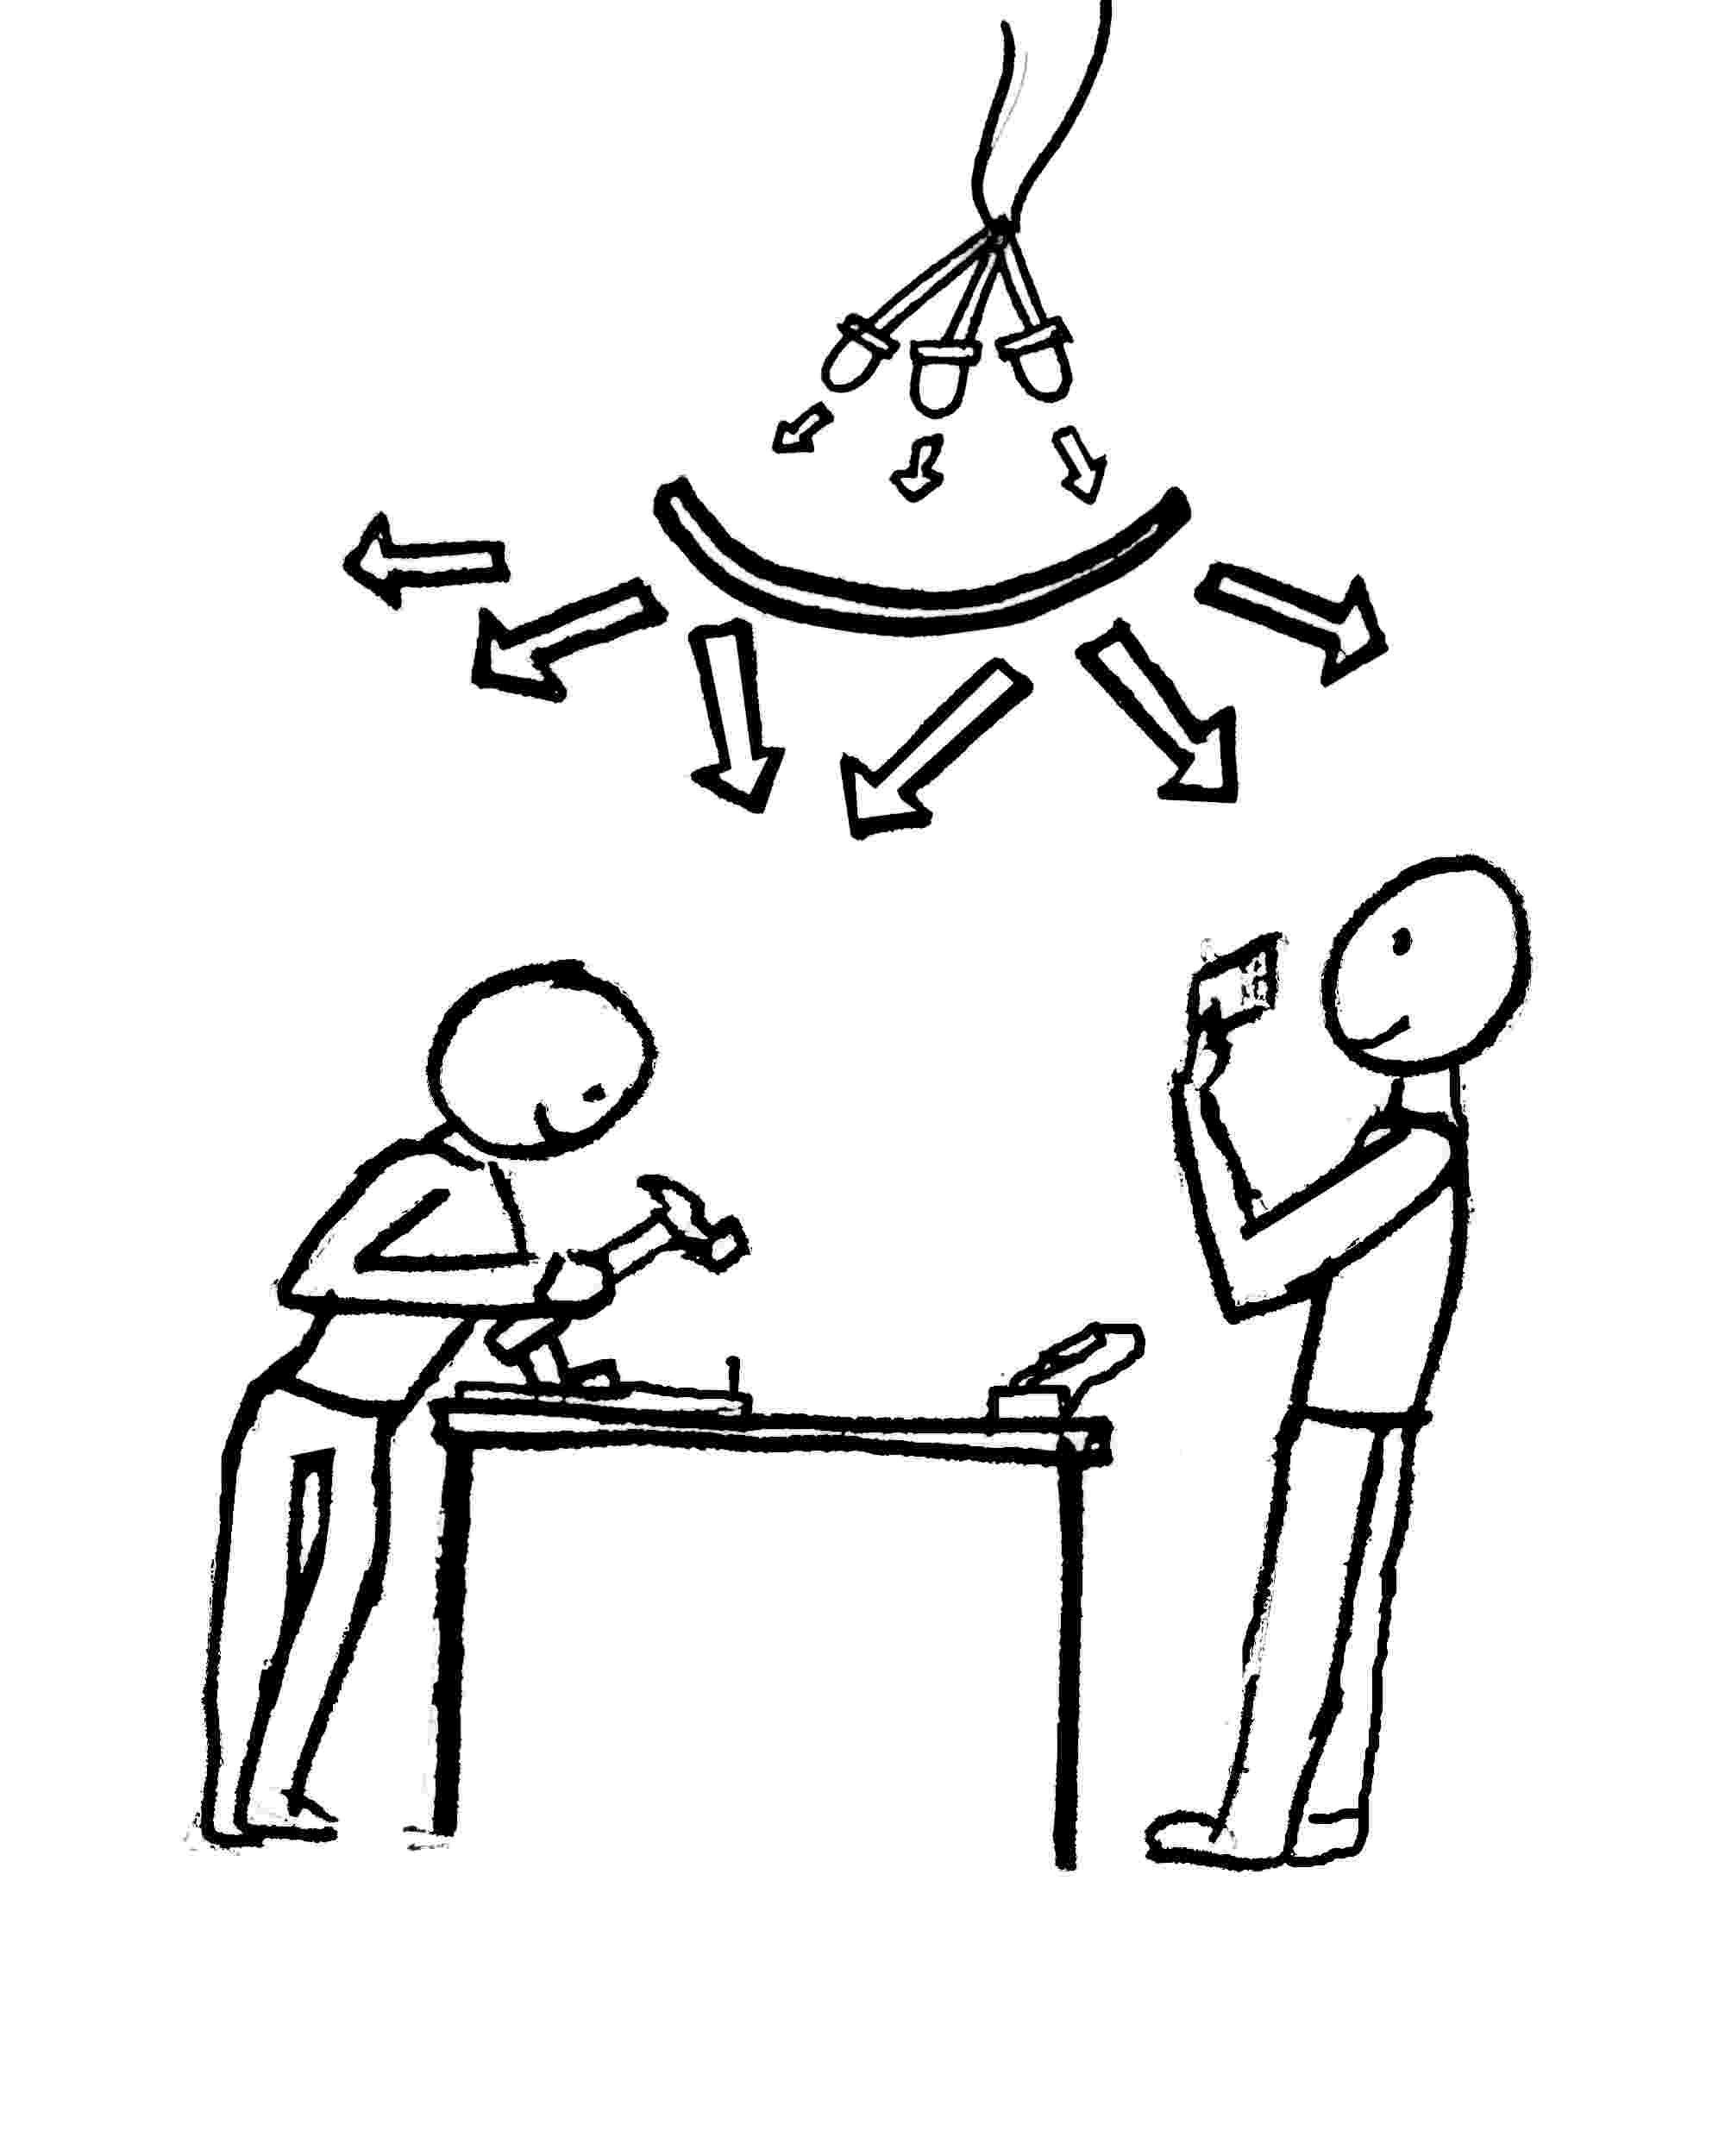
Diffusive materials can be used to spread light out over a large area, if the lamp is being used to light a large space – e.g. a ceiling lamp for lighting a work table
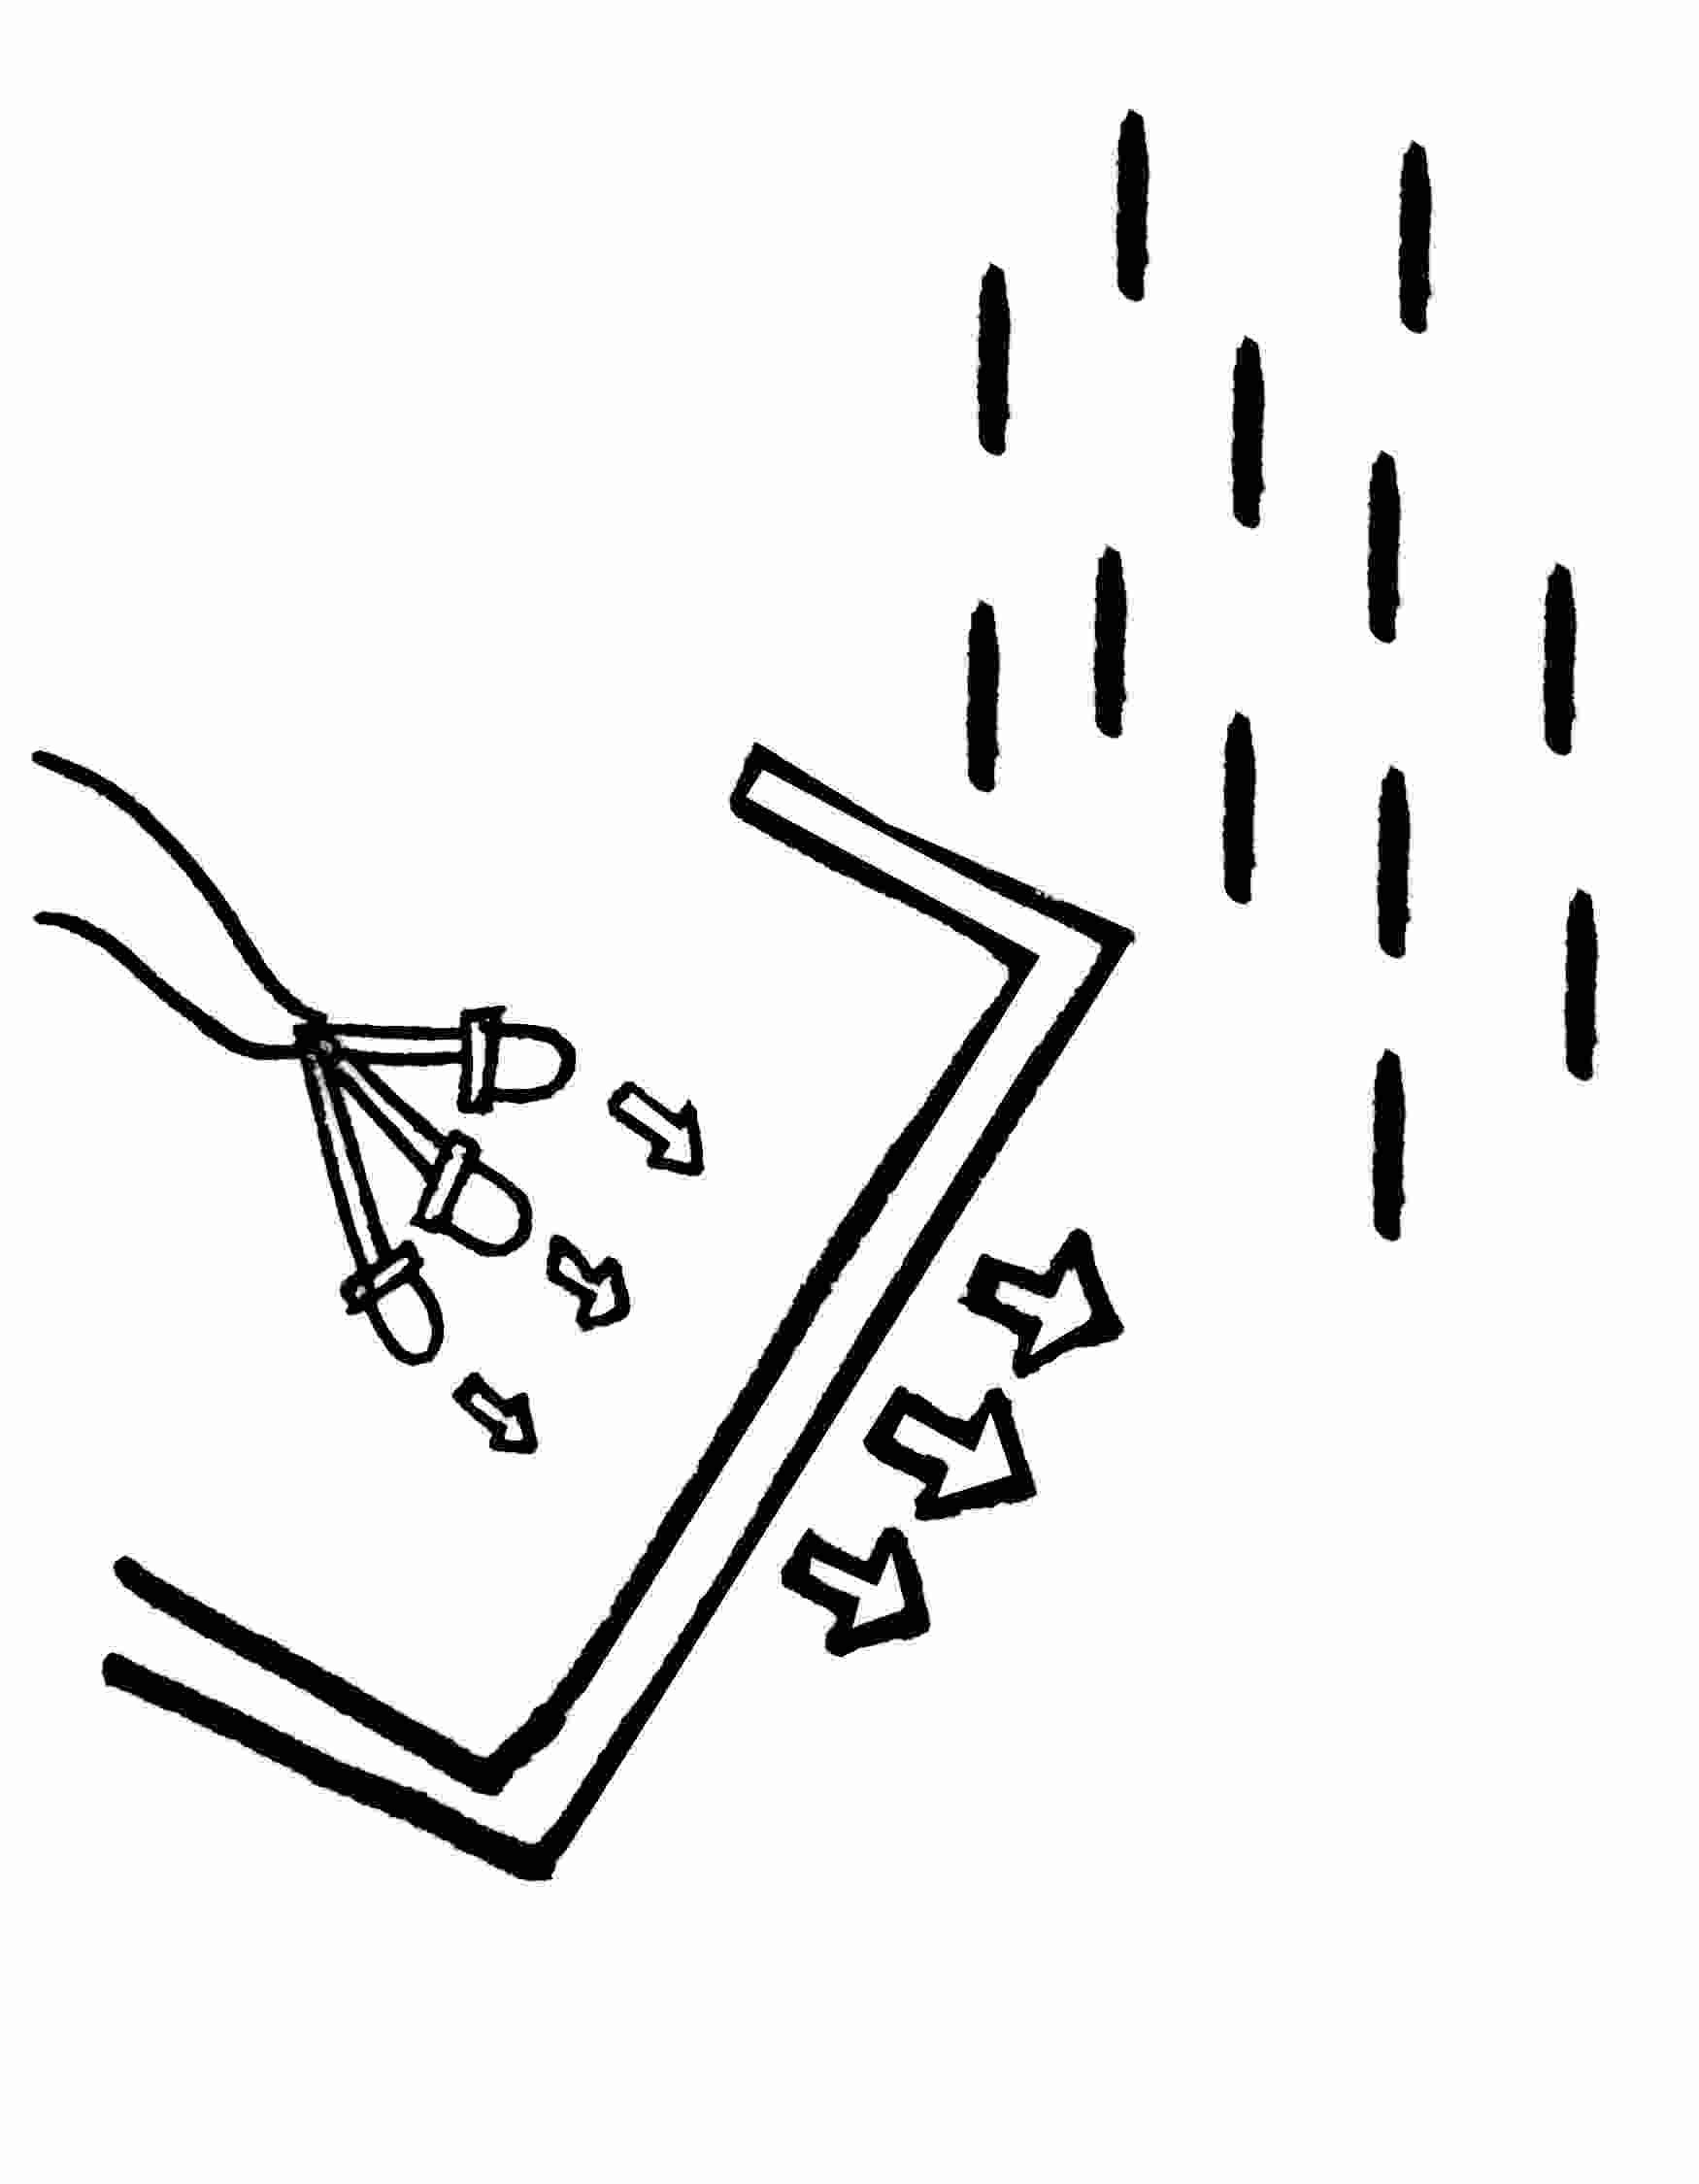
Transparent materials can be used (along with reflective and diffusive materials, if necessary) to protect the lamp from water, dust or other damage without interfering with the properties of the light. This could be used for a lamp meant to be used outdoors – e.g. a handheld torch.
2. Building the structure of the lamp
Make sure the students remember some basic building principles:
If the lamp is tall, make sure it has a stable base. A stable base is ideally heavy (much heavier than the top of the lamp) and wide. If the lamp is portable, make sure it can be easily carried in hand and won't fall apart when dropped – especially important is protecting the electronic components. Make sure the battery is supported in some way – never leave something hanging from a wire, since its weight will put stress on the connection, and the connection could break. If using metal as a component of the lamp structure, make sure it is not in contact with any bare wires, in case shorting occurs.
LESSON SCHEDULE
1. MEASURING PANEL VOLTAGE AND CURRENT
If the students haven't already, have them take their panels out into the sun and measure them with a multimeter. What voltage are they getting? What current are they getting? How do they know the battery is charging? What happens when they put the solar panel in darkness?
2. GROUP DISCUSSION
Have the students discuss the results they get. Talk to the students about what is happening when the solar panel charges the battery. Ask what might happen when the solar panel is out of the sun. Will it just stop charging, or will something else happen? Ask the students what they think would happen if they left the panel and battery circuit out overnight.
3. SET UP DISCHARGING EXPERIMENT
Tell the students we are going to test their ideas by leaving the circuits connected up in a dark place overnight (or until the next lesson). Have the students measure the voltage across their batteries (with a resistor between the positive and negative terminals) and write a note of it down until the next lesson.
4. GROUP DISCUSSION: DESIGNING A LAMP
Ask the students to think about all the ways that having a lamp that charges during the day and provides light at night could be useful. Have them split into groups and discuss ways that they could use their lamps and what kind of structure they would have to build to do that. Hand out pens and paper and encourage them to draw designs. Then have each of the students explain their designs to the class.
5. BASIC OPTICS
Get some materials with different optical properties (reflective, diffusive, transparent – e.g. tin foil, a translucent plastic bottle, clear glass) and some flashlights (torches) and pass them around the class. Have the students shine light on the materials and see how it behaves. Then get the group together and ask them to talk about what they've found. Explain what these different properties (reflection, diffusion and transparency) are called and how they can be used to build lamps (directing light, spreading it, protecting the bulbs).
6. STRUCTURAL CONSIDERATIONS
Talk to the class briefly about other design considerations – how to make a solid base, how to protect the battery and lights, etc. Tell them to think about these in relation to their designs – ask the class to come up with some design considerations of their own. Also brainstorm some of the materials they could use – let the class come up with some ideas for recycled lamp-building materials.
7. LAMP BUILDING
Let the students go “back to the drawing board” for a few minutes on their designs – have them draw a new design based on the information about optics and structure.
Then start a build session! This can either be done by having the students choose from a pile of pre-collected found/recyled material, or having them go outside the classroom themselves and find their own materials. Depending on how your class is set up, you may want to finish the lesson at this point, and let the students look for materials to bring in before the next lesson, where they can build the lamp.
When students are building the lamps, try to provide a selection of hand tools beforehand and check up on students to see if they need help, and make sure they're keeping in mind structural/optical design considerations – but try not to direct them too much! After everyone's built their lamp, have them show it to the class.